Screen Recording on iPad
How to record the screen on your iPad
In iOS 11 and above, you can create a screen recording and capture sound on your iPhone, iPad, or iPod touch.
Record your screen
- Add Screen Recording to Control Center. Go to Settings > Control Center > Customize Controls, then tap
 next to Screen Recording.
 - In iOS 12 or later, open Control Center by swiping down from the upper-right corner of the screen. (For iOS 11, swipe up from the bottom edge of the screen).
- To capture sound while you record, press deeply on
 and tap Microphone Audio.
 - Tap , then wait for the three-second countdown.
- To stop recording, open Control Center and tap
 . Or tap the red status bar at the top of your screen and tap Stop.
You can find your screen recording in the Photos app.
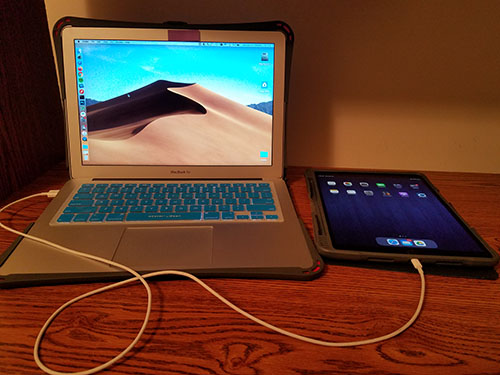
Another way to record your iPad screen is within QuickTime player. The iPad screen will display on your laptop.
- Connect your iPad to your computer with the iPad charging cable, like so:
- Open the QuickTime app on your laptop.
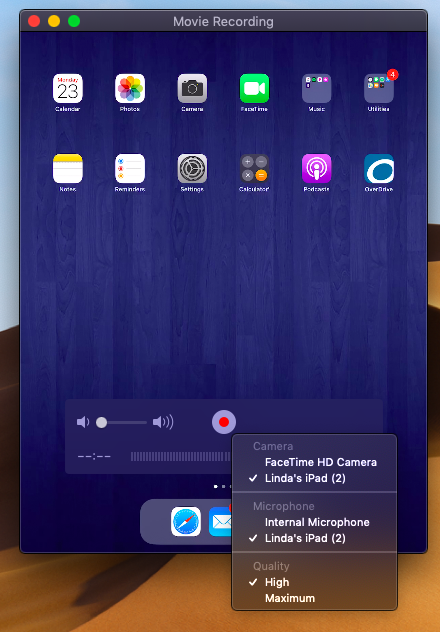
- Go to File and select ‘New Movie Recording’.

- A recording window will appear. You will a see little arrow for drop down menu in front of the record button. Click that arrow and select your iPad for Camera, as well as Microphone (if you want to record music, app/game sounds).

- Once Camera is selected, you will see your iPad creen displayed on your laptop.
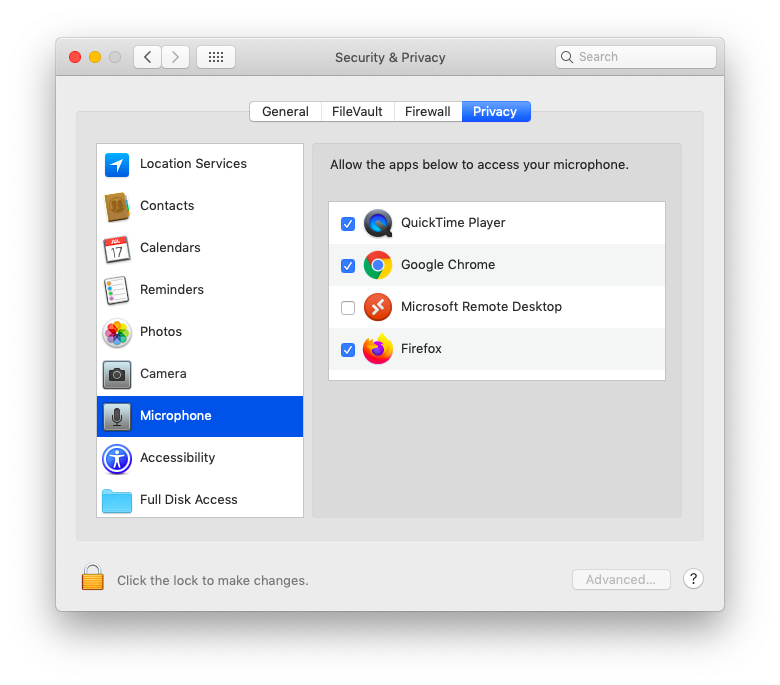
If you do not see your iPad screen displayed, open System Preferences, and click on Security and Privacy. Make sure QuickTime Player is checked for both Camera and Microphone.
- Click the Record button. Now perform the tasks on your iOS device that you want to record.
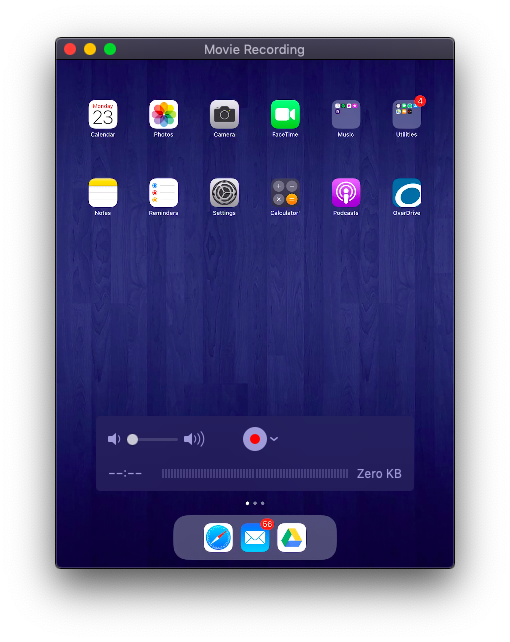
- Once done, tap the stop button and save the video.
- Done!
Record Your Face and Screen at the Same Time!
Thanks to Diego Navarro for this great addition!
There's a relatively straightforward way to record both your face and screen at the same time in case you're interested in that. Basically, in quicktime you click "new movie recording" and then "view-->always on top" and then it shows your face through your MacBook camera. You can resize the window and put it anywhere on the screen you want. You don't ever need to start the movie recording, however - in this scenario you're just getting the camera to put your face on the screen as you do the screencast.
You then start a screencast recording. It'll capture whatever is on your screen (which now includes you!).
Tag: